
The Art of Contouring: How to Sculpt Your Face Like a Pro
In the world of beauty, where trends ebb and flow like the tides, one technique has remained a steadfast favorite: contouring. This transformative art form allows makeup enthusiasts and professionals alike to sculpt their faces with the deftness of a sculptor chiseling away at a block of marble. Gone are the days when a simple swipe of blush defined our features; today, contouring offers a sophisticated approach to enhancing one’s natural beauty, creating dimensions that play with light and shadow. Whether you’re striving for an everyday polished look or aiming for a strikingly defined red carpet appearance, mastering the contours of your face can elevate your makeup game to new heights. In this article, we will explore the essential techniques, tools, and tips to help you achieve the sculpted visage of your dreams—discovering together how to become your own makeup artist and celebrate the beauty of individual features through the art of contouring.
Mastering the Fundamentals of Contouring Techniques
Contouring is an art form that requires a careful balance of color, technique, and precision. To achieve a sculpted look, begin with a quality foundation that matches your natural skin tone. Choose the right tools to aid your contouring journey; a fluffy brush is ideal for blending while a smaller, denser brush works well for defining specific areas. Utilize shades that are one to two shades darker than your skin tone for contouring and one to two shades lighter for highlighting. This contrast will help shape your features more effectively. When applying contour, focus on the following areas to maximize impact:
- Cheekbones: Apply product beneath the cheekbone to create depth.
- Jawline: Sculpt along the jaw to achieve a defined look.
- Nose: Use a smaller brush to contour the sides for a slimmer appearance.
To enhance your contouring finesse, mastering blending techniques is imperative. A well-blended contour looks seamless and natural. After applying your product, utilize a damp beauty sponge or your fingers to gently blend the edges, ensuring there are no harsh lines. Additionally, consider experimenting with the strobing technique alongside contouring to add luminosity to your features:
| Technique | Description |
|---|---|
| Contouring | Darken specific areas to create depth. |
| Highlighting | Brighten specific areas to reflect light. |
Incorporating these techniques will elevate your contouring game, allowing you to sculpt your face with precision and style. Remember, practice makes perfect, so don’t hesitate to experiment until you discover your ideal look.
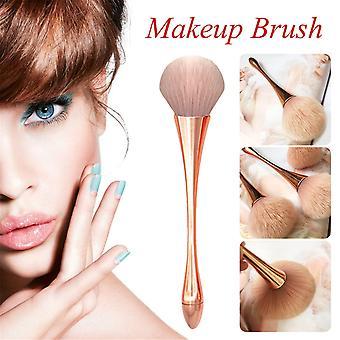
Essential Tools to Elevate Your Contouring Game
To master the art of contouring, having the right tools at your disposal is crucial. Begin with a high-quality contour brush, which should have a tapered, dense bristle head to allow for precision and blending. Pair this with a blending sponge, perfect for diffusing harsh lines and achieving a seamless finish. Additionally, a flat foundation brush can be indispensable for applying cream or liquid contours in a smooth, even layer. For those who prefer powder products, don’t underestimate the power of a fluffy powder brush to give a soft, diffused look.
Incorporating a few more essentials can elevate your contouring technique even further. Consider adding a highlighter brush, specifically designed with a smaller head to target the high points of your face, such as the cheekbones and brow bones. For detail work, a precision brush lets you sculpt with pinpoint accuracy, especially for the nose or jawline. Lastly, make sure you have a mirror with good lighting, as the right lighting can make all the difference in ensuring your contour appears flawless and natural. Here’s a quick summary of essential tools:
| Tool | Purpose |
|---|---|
| Contour Brush | Precision application for contour products |
| Blending Sponge | Seamless blending of cream or liquid contours |
| Highlighter Brush | Targeted application of highlighter on high points of the face |
| Precision Brush | Detail work for sculpting areas like the nose |
| Mirror with Lighting | Ensures accurate application and final touches |

Shades and Finishes: Choosing the Right Products for Your Skin
Choosing the right shades and finishes for contouring can be the difference between a flawless sculpt and a makeup misstep. Start by assessing your skin tone; warm undertones typically pair best with tones that have a golden or peachy base, while cool undertones should opt for taupe or ash shades. Once you know your undertone, consider the finishes you want to incorporate into your routine. Matte products create chiseled shadows, while satin or shimmer finishes can enhance certain areas, giving a more radiant and lifted appearance.
When selecting your products, keep in mind the following:
- Foundation Compatibility: Ensure your contour product works harmoniously with your foundation.
- Texture Preference: Creams provide a natural blend, while powders are excellent for layering.
- Application Method: Most prefer the ease of a stick or cream for beginner-friendly application.
Additionally, if you’re feeling adventurous, consider creating a custom palette by combining different shades and finishes based on your personal preferences. Below is a simple guide to popular contouring shades for various skin tones:
| Skin Tone | Suggested Contour Shade | Finish |
|---|---|---|
| Fair | Cool Taupe | Matte |
| Medium | Chestnut Brown | Satin |
| Olive | Warm Caramel | Matte |
| Deep | Rich Espresso | Matte |
Blending Secrets for a Flawless, Sculpted Look
Achieving a flawless, sculpted look is all about the art of blending. To master this essential technique, consider these tips that can elevate your contouring game:
- Choose the Right Tools: Use a damp makeup sponge or a soft brush. Both options offer varying degrees of coverage and sheer application, allowing for a seamless finish.
- Layer Strategically: Start with light layers and build up the intensity. Gradual build-up helps in avoiding harsh lines that can disrupt your desired look.
- Blend, Blend, Blend: Never underestimate the power of good blending. Focus on blending in circular motions to diffuse the product evenly across the skin.
Understanding the importance of color correction can truly enhance your results. Here’s a quick reference to the different shades and their purposes:
| Color | Purpose |
|---|---|
| Cool Tones | Perfect for creating shadow on the face. |
| Warm Tones | Ideal for adding warmth and dimension. |
| Neutral Shades | Versatile for both contouring and highlighting. |
To Conclude
As we conclude our journey through the transformative world of contouring, it’s clear that this art form goes beyond mere makeup application; it’s a celebration of individuality and creativity. With the right techniques and a bit of practice, you can master the skill of sculpting your face, enhancing your natural features with precision and confidence. Remember, contouring is not just about what you put on your skin, but how you express yourself through it. Embrace the power of contouring, and let your face tell your unique story.
For those looking to further elevate their beauty journey, discover the ultimate beauty and wellness experience at In & Out Beauty Spa (www.inandoutbeauty.co.za). Whether you’re seeking a rejuvenating spa treatment or looking for trusted beauty providers in your area, we’ve got you covered. Explore our service directory today and find the perfect beauty solution near you!